Table of Contents
ToggleNothing ruins a backyard hangout faster than feeling exposed to every neighbor’s window or passing pedestrian. Whether someone’s grilling burgers in their underwear or just wants to read without an audience, privacy panels solve the problem without the permanence or cost of a masonry wall. These modular barriers create instant seclusion, block wind, muffle noise, and can even double as vertical gardens or backdrop screens. They’re easier to permit (or don’t require one at all, depending on height and setback), faster to install, and flexible enough to move or reconfigure as needs change. For homeowners who crave control over their outdoor living space, privacy panels are a smart, scalable investment.
Key Takeaways
- Backyard privacy panels offer a faster, more flexible alternative to traditional fences, requiring fewer permits and allowing homeowners to section off specific areas without permanent installations.
- Material choice depends on climate and maintenance tolerance: wood suits temperate budgets, composite and metal excel in humid or coastal areas with minimal upkeep, and each option ranges from $3 to $12+ per board foot.
- Proper installation requires 24-inch deep post footings set in concrete, accurate leveling, and exterior-grade fasteners to ensure stability and prevent costly repairs or safety issues.
- Creative enhancements like vertical gardens, integrated lighting, and mass-loaded vinyl layers transform privacy panels into multifunctional elements that add style, sound dampening, and property value.
- Regular maintenance—sealing wood every 2–3 years, inspecting fasteners seasonally, and clearing debris—extends panel lifespan and keeps your backyard privacy solution looking polished.
What Are Backyard Privacy Panels and Why Do You Need Them?
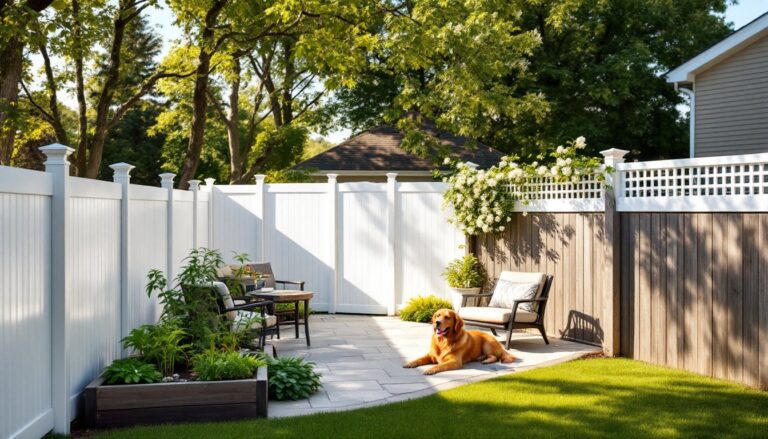
Privacy panels are freestanding or post-mounted partitions designed to shield outdoor spaces from sightlines, wind, and noise. Unlike traditional fences that require continuous runs and often dig into property lines, panels are modular, think individual sections ranging from 4 to 8 feet wide and 5 to 8 feet tall. They can stand alone, link together, or anchor to existing structures like deck railings or pergola posts.
Most panels attach to vertical posts set in concrete footings or heavy-duty bases. Some models use weighted planters or ground stakes for portability, which works well for renters or seasonal setups. Height matters: in many jurisdictions, structures over 6 feet require permits, and setback rules (often 3 to 5 feet from property lines) vary. Always check local codes before digging.
Why choose panels over a solid fence? Speed and flexibility. A homeowner can section off a hot tub corner, screen a compost bin, or create a windbreak for a fire pit without enclosing the entire yard. Panels also dodge some of the neighbor disputes that come with shared-property-line fences, since they’re wholly on one side. And if the layout changes, new patio, bigger garden bed, panels move with the plan.
Types of Privacy Panels for Every Backyard Style
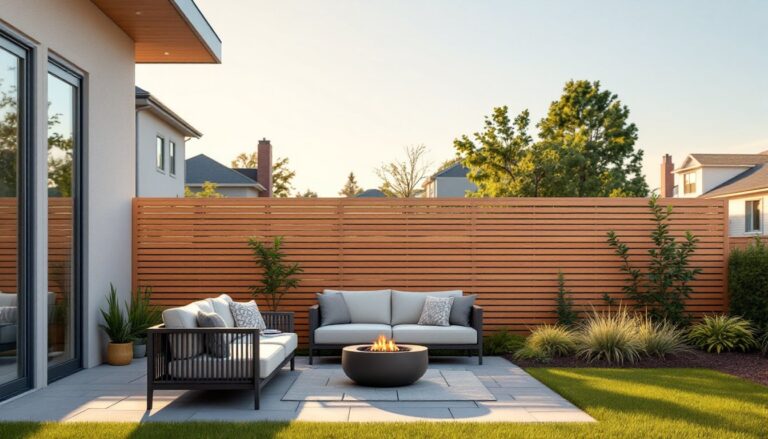
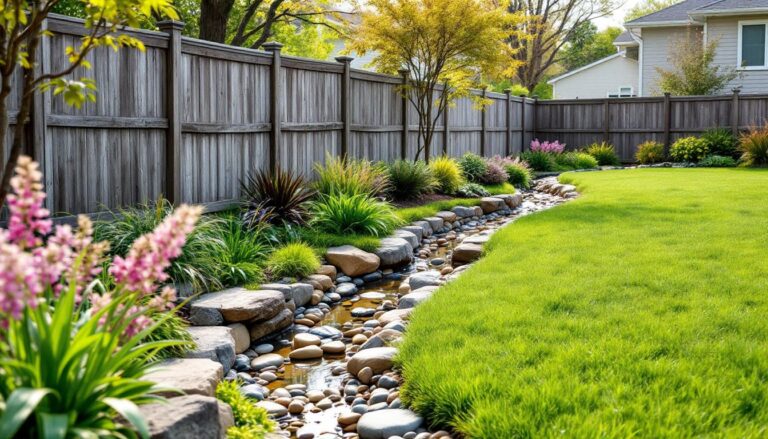
Wood Privacy Panels
Wood remains the DIY favorite for good reason: it’s affordable, easy to cut and fasten, and blends into nearly any landscape. Cedar and redwood are naturally rot-resistant and weather to a silvery patina without treatment, though they cost more upfront, expect $8 to $12 per board foot. Pressure-treated pine runs $3 to $5 per board foot and lasts decades if properly sealed, but it starts off with a greenish tint that takes a year to fade before staining.
Common panel styles include horizontal slats (modern, clean lines), vertical pickets (traditional cottage look), and lattice tops (partial privacy with airflow). For a contemporary backyard entertainment area, horizontal cedar slats spaced 1 to 2 inches apart deliver filtered views and shadow play. Tight board-on-board or tongue-and-groove patterns block sightlines completely but can trap wind and require deeper footings.
Maintenance: Plan to seal or stain every 2 to 3 years. Use a semi-transparent exterior stain to preserve wood grain, or solid stain for full opacity. Skip the paint, it chips and peels faster than stain on outdoor wood.
Metal and Composite Options
Metal panels, aluminum, steel, or corten, suit industrial or modern aesthetics and need almost zero upkeep. Powder-coated aluminum resists rust and comes in laser-cut patterns (geometric, botanical) that let light through while obscuring details. Corten steel develops a protective rust patina over months: it’s striking but can stain adjacent concrete or pavers during the oxidation process. Lay down landscape fabric or gravel catchment if using corten near hardscapes.
Composite panels (typically wood fiber and recycled plastic) mimic wood grain without the rot or splinter risk. Brands like Trex or TimberTech offer privacy planks in gray, brown, and walnut tones. They won’t warp or crack, but they cost 30 to 50% more than treated lumber and can feel slick when wet. Composite works well in humid climates or for homeowners who won’t commit to annual sealing.
Other alternatives include corrugated metal (galvanized or painted), which costs less than laser-cut aluminum but looks more utilitarian, and bamboo roll fencing attached to a frame, a fast, budget option that degrades in 3 to 5 years and best suits temporary or seasonal screening.
How to Choose the Right Privacy Panels for Your Space
Start by measuring the area and sketching the layout. Consider sightlines from inside the house, neighbor windows, and street views. Walk the perimeter at different times of day, morning sun, afternoon glare, and evening lighting all shift which spots feel exposed.
Height and spacing: For full privacy, aim for panels at least 6 feet tall. If local codes cap fences at 6 feet without a permit, stick to that mark. Partial privacy, blocking waist-to-shoulder views, works at 4 to 5 feet and still lets breeze through. Space multiple panels 6 to 8 feet apart on center for structural stability: closer spacing creates a continuous wall effect.
Material and climate: Wood suits temperate zones and budgets under $500 for a small section. In coastal or high-humidity areas, composite or metal outlasts wood with less upkeep. Metal also handles high wind better, look for panels rated to 90+ mph if storms are common.
Style and function: Lattice or slatted panels reduce wind load and allow climbing plants. Solid panels block noise better, helpful near busy streets, but can turn into sails in gusts. For a backyard entertainment zone, mixing solid lower sections with open lattice tops keeps things breezy without sacrificing privacy at eye level.
Mounting method: Freestanding panels with weighted bases (planters filled with soil or sand) work for renters or temporary setups. For permanent installations, set 4×4 posts in concrete footings at least 24 inches deep (deeper in frost-prone regions, check local frost line). Surface-mount options exist for decks and patios but require blocking or reinforced joists underneath to handle lateral loads.
Installing Backyard Privacy Panels: A Step-by-Step DIY Guide
This guide covers a basic post-and-panel installation using 4×4 treated posts and prefab or DIY wood panels. Adjust for metal or composite materials as needed.
Tools and materials:
- 4×4 pressure-treated posts (8-foot length: actual dimension 3.5″ × 3.5″)
- Post-hole digger or power auger
- 80-lb bags of fast-setting concrete (two per post)
- Level (4-foot and torpedo)
- Circular saw or miter saw
- Drill/driver with 3-inch exterior screws and masonry bits (if attaching to concrete)
- Privacy panel sections (purchased or built)
- Gravel (optional, for drainage)
- Safety glasses, gloves, ear protection
Step-by-step:
-
Mark post locations. Use stakes and string to outline the panel run. Space posts according to panel width, most prefab panels fit 6- to 8-foot spans. Check for underground utilities (call 811) before digging.
-
Dig post holes. Go at least 24 inches deep (or one-third the post’s above-ground height) and 8 to 10 inches wide. In frost zones, dig below the frost line, typically 36 to 48 inches in northern states. Pour 2 to 3 inches of gravel in the bottom for drainage.
-
Set the first post. Drop the post into the hole. Use a level on two adjacent sides to confirm plumb. Brace with scrap lumber staked to the ground. Pour dry fast-setting concrete into the hole, then add water per bag instructions (or pre-mix and pour). Fill to 2 inches below grade and slope the top away from the post.
-
Set remaining posts. Repeat for each post location, checking alignment with string lines. Let concrete cure per manufacturer specs, usually 20 to 40 minutes for fast-set, 24 to 48 hours for standard mix.
-
Attach panels. Once posts are set, position the panel between posts. Use a level to confirm it’s plumb and mark fastener locations. Pre-drill pilot holes to prevent splitting, then drive 3-inch exterior screws through the panel frame into the post. For metal panels, use stainless steel or coated fasteners to avoid rust stains. Some systems use brackets or clips, follow manufacturer instructions.
-
Trim and finish. Cut post tops at a uniform height (typically 1 to 2 inches above the panel) at a 15-degree angle to shed water. Add post caps if desired. Seal or stain wood panels within a week of installation for best penetration.
Common mistakes: Skipping the level check (crooked panels are obvious and hard to fix). Setting posts too shallow (panels lean or topple in wind). Over-tightening screws (splits wood fibers). Using indoor screws or non-coated fasteners (rust stains and corrosion).
When to call a pro: If the site slopes more than 6 inches over the panel run, requires retaining-wall integration, or sits near utility easements, hire a fence contractor or landscape engineer. Structural work near property lines may also trigger surveys or easement reviews.
Creative Ways to Enhance Your Privacy Panels
Privacy panels don’t have to be static barriers. With a few upgrades, they become functional backdrops that add style and utility.
Vertical gardens: Mount galvanized or plastic planter pockets directly to wood or composite panels. Plant trailing vines (pothos, ivy), herbs (basil, mint), or succulents for texture. Ensure the panel can handle the added weight, use 2×4 or 2×6 framing behind the face boards if retrofitting. Drip irrigation or self-watering pockets reduce maintenance. Design inspiration from garden experts can guide plant selection for regional climates.
Integrated lighting: Run low-voltage LED strip lights along the top or bottom edge of panels for ambient glow. Solar-powered spotlights mounted on posts highlight plants or architectural details without trenching electrical lines. For permanent wiring, hire a licensed electrician, outdoor receptacles and fixtures must meet NEC (National Electrical Code) standards for wet locations.
Paint and stain effects: Two-tone stains (dark posts, light panels) add depth. Murals or geometric patterns work on solid panels facing patios, use exterior latex or acrylic paint with UV inhibitors. Stencils simplify complex designs. Outdoor decor ideas from home pros showcase color palettes that hold up in sun and rain.
Functional add-ons: Hang hooks for garden tools, fold-down tables for potting, or outdoor artwork. Attach a trellis extension above the panel for climbing roses or clematis, this raises the privacy line without hitting permit thresholds. For sound dampening near busy streets, sandwich mass-loaded vinyl (MLV) between two panel layers: it’s pricey but cuts noise by 10 to 15 decibels.
Seasonal flexibility: Use removable panel inserts (bamboo screens, fabric sails, or lattice) that swap out for holidays or weather changes. Velcro straps or clips make switching fast. In winter, store fabric panels indoors to prevent mildew. Regional home style tips often include seasonal outdoor decor that pairs well with modular panels.
Maintenance cadence: Inspect fasteners and post stability every spring. Tighten loose screws, replace rusted hardware, and reapply sealant to wood. Composite and metal need only a rinse with a garden hose. Clear debris from post bases to prevent moisture rot in wood or rust in metal.