Table of Contents
ToggleChoosing the right pavement for a backyard isn’t just about aesthetics, it’s about function, drainage, maintenance, and how the space will actually get used. A patio that looks stunning in photos but cracks after one winter or turns into a mud pit after rain isn’t doing anyone favors. Whether planning a dining area, a fire pit zone, or a path through the garden, the pavement sets the foundation, literally, for everything else. This guide walks through ten proven pavement options, from classic concrete pavers to permeable surfaces, with real-world pros, cons, and installation considerations for each.
Key Takeaways
- Backyard pavement ideas must balance aesthetics, drainage, durability, and maintenance to ensure long-lasting functionality and prevent issues like pooling water or surface cracking.
- Concrete pavers offer the most versatile and cost-effective option ($8–$30 per square foot installed) with easy DIY installation and the ability to replace individual damaged pavers without full replacement.
- Natural stone like flagstone and bluestone creates a high-end look but costs $30–$50+ per square foot installed and requires sealing every 2–3 years for protection.
- Gravel and decomposed granite provide budget-friendly surfaces ($1–$3 per square foot) that are excellent for drainage, though they require periodic top-dressing and aren’t suitable for heavy traffic areas.
- Permeable pavement systems address stormwater runoff concerns and can help meet municipal regulations, though they cost $10–$40 per square foot and need regular vacuuming to prevent clogging.
- Matching pavement to your home’s architecture, planning for proper drainage slope (1/4″ per foot), and mixing two to three materials creates visual interest while keeping installation and maintenance manageable.
Why Choose the Right Pavement for Your Backyard
Backyard pavement does more than fill empty space. It defines traffic patterns, manages water runoff, and establishes the visual tone of the entire outdoor area. Get it wrong, and the result is pooling water, weed growth through cracks, or a surface that becomes unusable after a few seasons.
Drainage is the first consideration. Solid surfaces like poured concrete can create runoff issues if not properly graded or paired with drainage solutions. Permeable options like gravel or specialty pavers allow water to filter through, reducing erosion and preventing standing water.
Durability matters just as much. High-traffic areas near grills or seating zones need materials that won’t shift, crack, or require constant releveling. Freeze-thaw cycles in colder climates demand pavement that can handle expansion and contraction without heaving.
Maintenance varies wildly. Natural stone requires periodic sealing. Gravel needs occasional top-dressing. Concrete pavers might settle and need resetting every few years. Budget time and effort into the equation, not just the initial install cost.
Finally, aesthetics should complement the home’s architecture and the yard’s purpose. A formal flagstone patio works for entertaining backyard spaces, while a casual gravel path suits a cottage garden. The pavement choice should feel intentional, not like an afterthought.
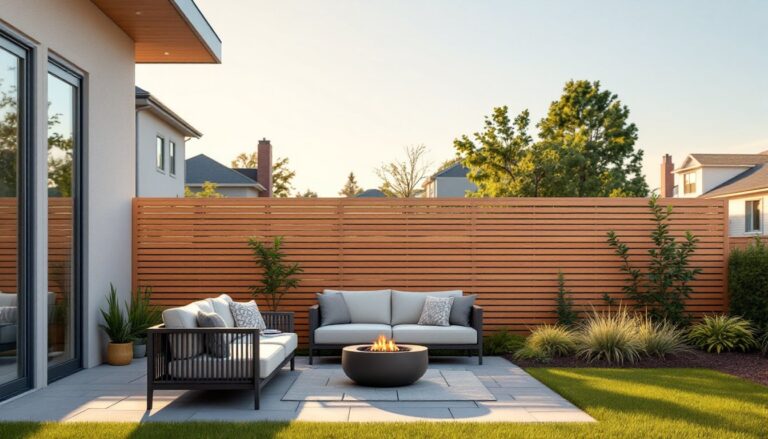
Classic Concrete Pavers for Timeless Appeal
Concrete pavers remain one of the most versatile and cost-effective backyard pavement options. Available in dozens of shapes, sizes, and colors, they work for everything from formal patios to casual walkways.
Standard paver dimensions include 4″×8″, 6″×6″, 12″×12″, and larger format slabs up to 24″×24″. Thickness typically ranges from 1.5″ for pedestrian areas to 2.375″ or more for driveways that might see vehicle traffic. Thicker pavers handle heavier loads without cracking.
Installation requires a compacted gravel base (usually 4″–6″ of crushed stone), a 1″ layer of coarse sand for leveling, and edge restraints to prevent spreading. Polymeric sand swept into the joints locks pavers together and inhibits weed growth. A plate compactor (rentable at most tool centers) ensures a stable, level surface.
Pros: Wide selection, relatively easy DIY installation, individual pavers can be lifted and replaced if damaged, and they handle freeze-thaw cycles better than poured concrete. Modern interlocking designs offer additional stability.
Cons: Pavers can settle unevenly if the base isn’t properly compacted, requiring periodic releveling. Weeds and moss can grow in joints if polymeric sand fails. Colors may fade over time with UV exposure, though sealers help.
Cost runs $8–$15 per square foot for materials and DIY labor, or $15–$30 installed by a contractor, depending on region and paver style. For design inspiration, resources like Gardenista’s paver guide offer layout ideas and material comparisons.
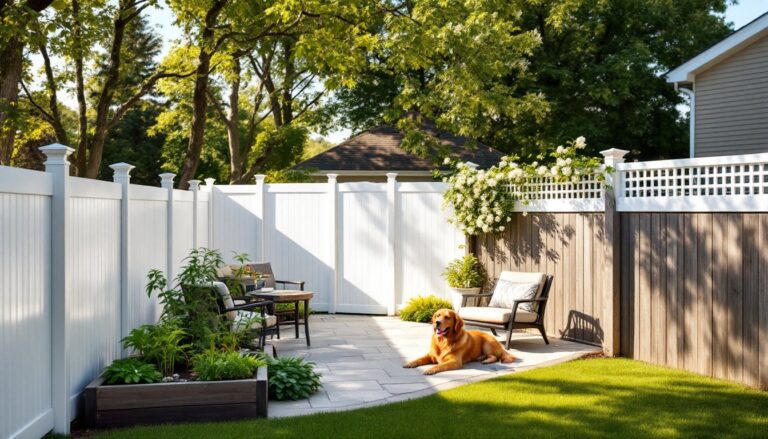
Natural Stone Options for Elegant Outdoor Living
Natural stone brings unmatched character to backyard hardscaping. Flagstone, bluestone, slate, and limestone each offer distinct textures and color palettes, creating a high-end look that concrete can’t replicate.
Flagstone (typically sandstone or quartzite) is sold in irregular shapes or cut into rectangular pieces. Irregular flagstone ranges from 1″ to 2″ thick and works beautifully for informal patios or stepping-stone paths. Cut flagstone provides cleaner lines for formal spaces.
Bluestone is a dense, durable sedimentary stone available in blue-gray to rust tones. Common dimensions include 12″×12″, 18″×18″, and larger custom sizes. It’s a premium choice for pool decks and patios because it stays relatively cool underfoot and resists fading.
Slate offers rich colors, purples, greens, grays, but can be slippery when wet. It’s best suited for covered patios or low-traffic areas. Limestone is softer and more porous, requiring sealing to prevent staining and weathering.
Installation for irregular stone typically involves a dry-laid method: a compacted gravel base, sand leveling layer, and stone set with joints filled by decomposed granite, gravel, or groundcover like creeping thyme. Cut stone can be mortared over a concrete slab for a more permanent installation, but this isn’t a DIY-friendly approach without masonry experience.
Pros: Unique, one-of-a-kind appearance: extremely durable when properly installed: adds significant resale value. Stone patios in southern outdoor living spaces are classic for good reason.
Cons: Expensive, $15–$30+ per square foot for materials alone, and professional installation pushes costs to $30–$50+ per square foot. Stone is heavy, making DIY transport and placement labor-intensive. Most types require sealing every 2–3 years to protect against stains and moisture.
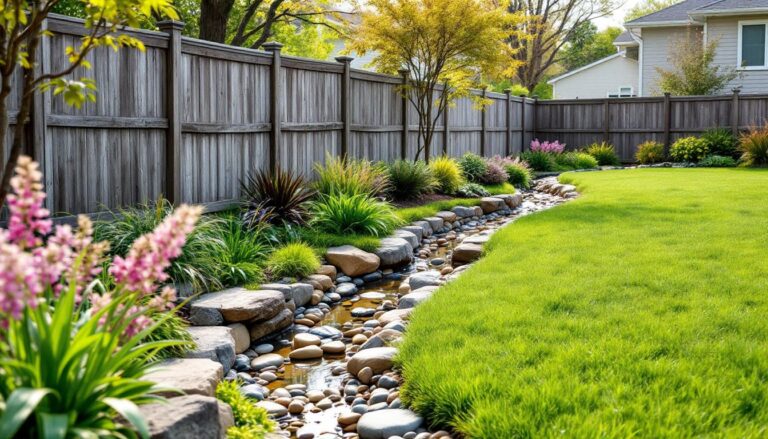
Gravel and Crushed Stone for Budget-Friendly Charm
Gravel is the go-to for homeowners wanting a rustic, low-cost backyard surface that still looks intentional. Pea gravel, crushed granite, and decomposed granite (DG) are the most common choices.
Pea gravel (smooth, rounded stones about 1/4″ to 3/8″ in diameter) is comfortable underfoot and works well for pathways, dog runs, and casual seating areas. It drains quickly but shifts underfoot, so it’s not ideal for heavy furniture or high-traffic zones.
Crushed granite or crushed stone (angular, 1/4″ to 3/4″ pieces) compacts better than pea gravel, creating a firmer walking surface. It’s often used for driveways and patio bases. Colors range from gray to tan to reddish-brown, depending on the stone source.
Decomposed granite is a finely crushed granite that, when compacted and moistened, forms a semi-solid surface. It’s popular in arid climates and backyard hangout areas because it has a clean, natural look and excellent drainage.
Installation is straightforward: clear the area, lay landscape fabric to suppress weeds, install edge restraints (steel, wood, or stone), and spread gravel in 2″–4″ layers. A plate compactor firms up crushed stone and DG: pea gravel is left loose.
Pros: Inexpensive ($1–$3 per square foot for materials), excellent drainage, easy DIY install, and quick to adjust or expand. Gravel complements cottage gardens and informal landscapes beautifully.
Cons: Gravel migrates, it will spread into lawns and garden beds without solid edging. It’s not wheelchair or stroller-friendly. Weeds can still sprout through landscape fabric over time. Snow removal is tricky: gravel and snow shovels don’t mix. Periodic top-dressing (adding a fresh layer every 2–3 years) is necessary to maintain appearance and coverage.
Permeable Pavement Solutions for Eco-Conscious Homeowners
Permeable pavement addresses a growing concern: stormwater runoff. Traditional solid surfaces shed water into storm drains, carrying pollutants and overwhelming municipal systems. Permeable options let water infiltrate on-site, recharging groundwater and reducing erosion.
Permeable pavers look similar to standard concrete pavers but feature wider joints (typically 3/8″ to 1/2″) filled with permeable aggregate instead of sand. Some systems use grid-style pavers with large open cells that can be filled with gravel or planted with grass.
Porous asphalt and pervious concrete are installed like their traditional counterparts but use a no-fines mix, aggregate without sand, that creates voids for water to pass through. These are specialty installs requiring experienced contractors and proper sub-base design (usually 6″–12″ of open-graded stone).
Grass pavers or turf reinforcement grids are plastic or concrete grids that support grass growth while providing a stable surface for occasional vehicle traffic. They’re ideal for overflow parking or fire lanes that need to stay green.
Installation complexity varies. Permeable pavers can be a DIY project with careful attention to base prep and joint filling. Porous asphalt and pervious concrete require professional installation, improper mixing or grading leads to clogging and failure.
Pros: Reduces runoff and erosion, helps meet stormwater regulations in some municipalities, recharges groundwater, and can qualify for green building incentives. Permeable surfaces are increasingly popular for outdoor entertaining areas where drainage matters.
Cons: Higher upfront cost ($10–$20+ per square foot for permeable pavers, $15–$40 for porous asphalt or pervious concrete). Requires periodic maintenance, vacuuming or pressure washing to prevent sediment from clogging pores. Not suitable for areas with heavy clay soils that drain poorly.
Design Tips for Choosing Your Backyard Pavement
Selecting pavement isn’t just about picking a material, it’s about integrating that material into a cohesive design that serves the yard’s function and complements the home’s style.
Match the architecture. A modern home with clean lines pairs well with large-format concrete pavers or sleek bluestone. A bungalow or cottage-style house calls for irregular flagstone, brick pavers, or decomposed granite. Hunker’s home design tips show how material choices echo interior and exterior aesthetics.
Consider foot traffic. High-use zones, paths from the house to the garage, areas around grills or fire pits, need stable, level surfaces. Concrete pavers, cut stone, or compacted DG are smart choices. Low-traffic side yards or garden paths can handle looser materials like pea gravel.
Mix materials for visual interest. Combining pavement types adds dimension. A flagstone patio bordered by a pea gravel path, or concrete pavers with grass joints, breaks up monotony and defines separate zones within the yard. Use contrasting textures and colors, but stick to two or three materials max to avoid a chaotic look.
Plan for drainage and slope. Any paved area should slope 1/4″ per foot away from structures to prevent water from pooling or running toward the foundation. If the yard has natural drainage issues, permeable pavement or strategically placed gravel channels can redirect runoff.
Think long-term maintenance. A homeowner who doesn’t want to reseal stone every few years should opt for concrete pavers or gravel. Someone willing to invest time for a premium look will appreciate natural stone’s aging and patina. Honesty about maintenance habits prevents buyer’s remorse.
Budget for the whole project. Pavement cost is only part of the equation. Factor in base materials (gravel, sand), edging, tools (plate compactor rental, masonry saw), and labor if hiring out. A $5-per-square-foot material can balloon to $20+ per square foot installed once all costs are tallied.
Finally, check local building codes. Some jurisdictions limit impermeable surfaces or require permits for patios over a certain size. It’s rare for basic backyard hardscaping, but always worth confirming before breaking ground.
Conclusion
Backyard pavement isn’t a one-size-fits-all decision. The right choice balances budget, maintenance, aesthetics, and how the space will actually be used. Concrete pavers offer flexibility and durability, natural stone brings timeless elegance, gravel provides budget-friendly simplicity, and permeable systems solve drainage challenges while supporting sustainability. Whether planning a backyard wedding setup or simply improving daily outdoor living, understanding the trade-offs ensures the pavement holds up, and looks great, for years to come.