Table of Contents
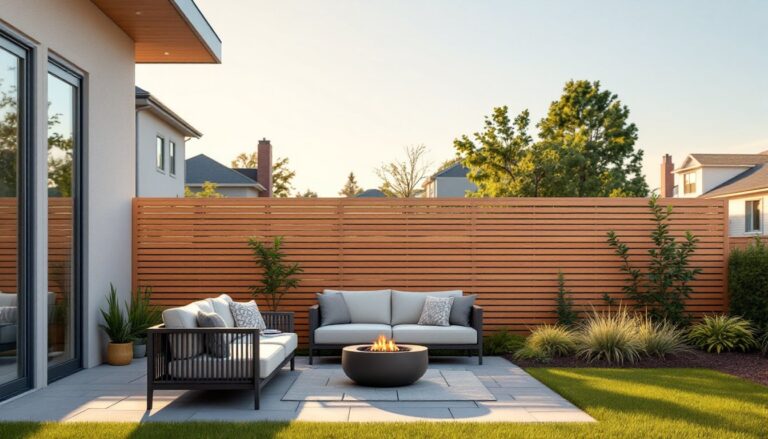
ToggleA backyard BBQ island isn’t just a grill on a patio, it’s a dedicated outdoor kitchen hub that turns casual cookouts into full-scale entertaining events. Whether grilling for a crowd or prepping weeknight meals under the stars, a well-designed BBQ island centralizes cooking, prep, and storage into one functional footprint. From compact patio solutions to sprawling L-shaped layouts with bar seating and built-in refrigeration, these structures blend utility with curb appeal. They’re permanent fixtures, typically built on concrete pads with masonry, steel framing, or manufactured modular kits, and designed to handle years of weather and use.
Key Takeaways
- A backyard BBQ island is a permanent outdoor kitchen structure that consolidates grilling, prep, and storage into one functional zone, adding measurable resale value and reducing indoor foot traffic.
- Classic straight islands and L-shaped or U-shaped designs offer flexibility for different spaces—from compact 4-to-6-foot layouts for small patios to sprawling 10-to-14-foot configurations for serious entertainers.
- Proper foundation, utility planning, and code-compliant gas, water, and electrical work are non-negotiable; projects involving these systems require professional installation and permitting.
- Material choices like concrete block with stone veneer, granite, or porcelain tile heavily influence durability; natural stone requires sealing every 1-2 years and must sit on reinforced concrete footings for weight distribution.
- Luxury features such as built-in refrigeration ($800–$2,500), side burners, sinks with hot water, and integrated lighting elevate entertainment value, though basic DIY modular kits offer a budget-friendly entry point starting at $2,000–$4,500.
- A hybrid DIY approach—hiring professionals for plumbing and electrical rough-ins while handling framing and finish work yourself—balances cost savings with code safety and structural integrity.
What Is a BBQ Island and Why Add One to Your Backyard?
A BBQ island is a freestanding or built-in outdoor structure that houses a grill and often includes counter space, cabinetry, sinks, refrigeration, or side burners. Unlike a standalone grill on wheels, an island is a permanent installation anchored to a concrete slab or reinforced paver base. Most are constructed using steel framing, masonry block, stacked stone veneer, or marine-grade polymer frames designed to withstand UV exposure and moisture.
The primary appeal is consolidation. Instead of shuttling ingredients from an indoor kitchen, a homeowner can prep, cook, and serve in one zone. This cuts down on foot traffic through the house and keeps the cook engaged with guests. It also adds measurable resale value, outdoor kitchens consistently rank among the top features buyers seek in warm-weather markets.
From a practical standpoint, BBQ islands solve common backyard inefficiencies. They eliminate the need for folding tables cluttered with condiments and tools. Built-in storage keeps propane tanks, utensils, and seasonings out of sight. Adding a sink (with proper drainage and freeze protection where applicable) means fewer trips indoors for cleanup. These aren’t cosmetic upgrades, they’re functional improvements that streamline outdoor cooking.
Classic Built-In Grill Islands for Traditional Outdoor Cooking
A classic built-in grill island follows a straight, linear layout with the grill as the centerpiece and flanking counter space on one or both sides. This design works well against a patio edge, fence line, or exterior wall, where it doesn’t obstruct sightlines or traffic flow.
Typical dimensions run 6 to 8 feet wide by 30 to 36 inches deep, matching standard outdoor kitchen counter height of 36 inches. The grill itself is usually a built-in drop-in model (not a freestanding cart), sized between 30 and 42 inches wide. Flanking counters provide 24 to 36 inches of prep space on each side, enough room for platters, cutting boards, and tools without crowding.
Material choices heavily influence durability and maintenance. Concrete block with stucco or stone veneer is the most common DIY-friendly approach. The block forms the structural frame, while veneer adds finished aesthetics. Built-in barbecue structures often incorporate natural stone like flagstone or granite for countertops, which handles heat and weather well but requires sealing every 1-2 years. Tile is another option, porcelain pavers offer freeze-thaw resistance and come in a range of finishes.
For the grill itself, natural gas hookups require a licensed plumber or gas fitter and often a permit. Propane setups are simpler but need ventilated cabinet access for tank swaps. Either way, the grill should sit on a non-combustible base and maintain clearances per manufacturer specs, typically 6 inches from combustibles on sides and rear.
Straight islands are the easiest to DIY if the homeowner has basic masonry or framing skills. Modular kits from manufacturers simplify the process further, arriving with pre-cut frames and panels that bolt together.
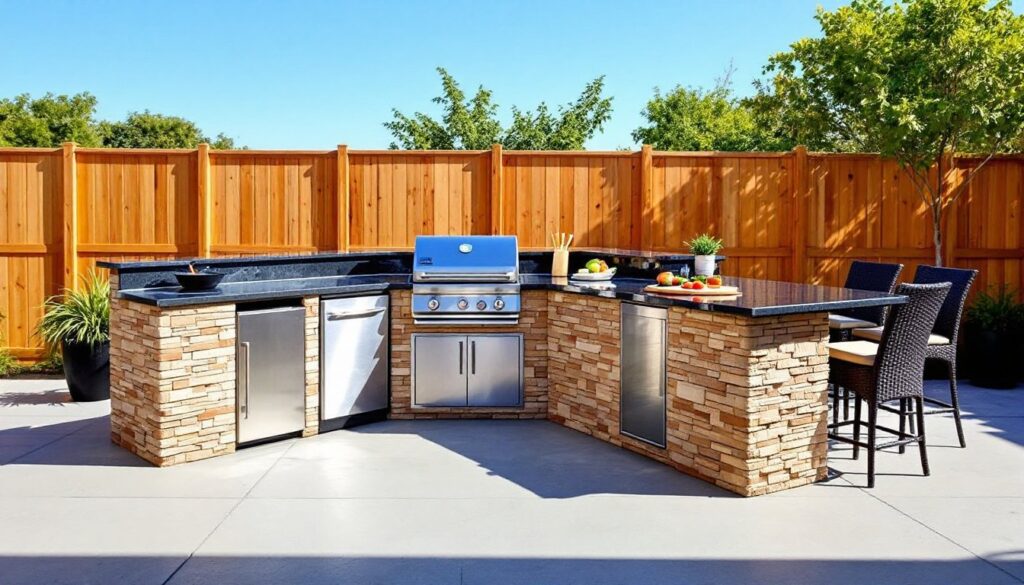
L-Shaped and U-Shaped Island Designs for Maximum Functionality
L-shaped and U-shaped islands expand the work triangle concept from indoor kitchens into outdoor entertaining spaces. These layouts create distinct zones for grilling, prep, and serving, with enough counter real estate to handle multiple cooks or a buffet spread.
An L-shaped island typically places the grill on one leg and a sink or side burner on the return leg, with continuous countertop connecting the two. This configuration works well in corner placements or where the island defines the edge of a patio. Total footprint runs 8 to 12 feet on the long side and 4 to 6 feet on the short return. Bar seating often fits along the outer edge, turning the island into a social anchor.
U-shaped designs enclose the cook on three sides, offering maximum counter and storage capacity. These are the workhorses for serious outdoor chefs or frequent entertainers. A typical U-shaped island spans 10 to 14 feet wide and 6 to 8 feet deep, with the open side facing the main patio or seating area. They often include a built-in refrigerator, trash drawer, warming drawer, and ample cabinet storage.
Both layouts require careful planning around utility runs. Gas lines, water supply, and electrical circuits (for outlets, lights, or refrigeration) need to be roughed in before the structure goes up. Electrical work must meet NEC standards for outdoor installations, GFCI-protected circuits, weatherproof boxes, and conduit runs. Water lines in cold climates need freeze protection: either blow-out valves for winterization or insulated/heat-traced lines.
Structurally, these larger islands benefit from reinforced concrete footings or a thickened-edge slab to support the added weight of stone veneer, heavy grills, and appliances. A standard 4-inch patio slab often isn’t enough, consult local codes or a structural engineer if adding significant load.
Because of the complexity, U-shaped and large L-shaped islands often make more sense as professional installs unless the homeowner has masonry and trades experience.
Compact BBQ Island Ideas for Small Backyards and Patios
Not every backyard has room for a sprawling outdoor kitchen, but even a 4-to-6-foot linear island can deliver most of the functionality without monopolizing patio space. Compact designs focus on essentials: a built-in grill, minimal prep counter, and storage underneath.
A common small-footprint layout is a 48-inch-wide island with a 24-to-30-inch drop-in grill and 12 to 18 inches of counter on one side. That’s enough space for a plate, tongs, and a cutting board, tight, but workable. Some designs skip side counters entirely and place a fold-down shelf or removable cutting board over a storage cabinet.
For small backyard spaces, portability can be a hidden advantage. Modular stainless steel or polymer frame kits assemble without mortar and can be relocated if the patio layout changes. These aren’t as permanent as masonry builds, but they’re faster to install and easier to DIY.
Another space-saving trick is vertical storage. Wall-mounted tool racks, magnetic knife strips, and overhead pot hooks keep the countertop clear. If the island backs up to a fence or wall, consider adding a pegboard panel or slatwall for hanging utensils and accessories.
Corner installations also maximize usable square footage. Tucking a compact island into an L-shaped patio corner frees up the center for seating or a fire pit. Just ensure there’s enough clearance, 36 inches minimum, for the cook to move comfortably and for cabinet doors to open.
Budget-conscious builders can use concrete pavers or landscaping blocks as a base structure, then finish with stucco or cement board siding. Countertops can be poured concrete (DIY-friendly with the right forms and mix), tile over cement backer board, or even granite remnants from a local fabricator, often available cheap as cutoffs from larger kitchen jobs.
Luxury Features to Elevate Your BBQ Island Experience
Once the basics are covered, high-end features turn a functional grill station into a backyard entertainment hub. These upgrades add convenience, capacity, and a bit of showmanship.
Built-in refrigeration is one of the most practical add-ons. Outdoor-rated refrigerators and beverage coolers are built to handle temperature swings and humidity. They typically run on standard 115V GFCI-protected circuits and fit into 24-inch-wide cabinet openings. Expect to pay $800 to $2,500 depending on capacity and brand.
Side burners and griddles expand cooking options beyond the main grill. A single or double side burner (similar to a stovetop) handles sauces, sides, or a morning skillet. A built-in flat-top griddle is ideal for smash burgers, pancakes, or stir-fries. Both require either propane quick-connects or natural gas taps.
Pizza ovens have surged in popularity. These can be standalone units set on the countertop or built-in models integrated into the island structure. Wood-fired ovens require ventilation and clearance from combustibles, plus a reinforced base, they’re heavy. Gas-fired models are simpler to install and maintain consistent temps.
For evening entertaining, integrated lighting makes a difference. LED strip lights under the countertop or inside cabinets illuminate work surfaces without harsh overhead glare. Pendant or sconce fixtures mounted on a pergola beam or adjacent wall provide ambient lighting. All wiring must be outdoor-rated and properly grounded per NEC standards.
Sinks with hot water are a luxury worth considering. A simple cold-water tap is easy, run a garden hose line to a faucet and drain into a bucket or gravel pit. Adding hot water means installing a tankless water heater (propane or electric) nearby, which requires professional plumbing and gas/electrical work.
Outdoor-rated sound systems integrate speakers into the island structure or nearby posts, often controlled via Bluetooth. Keep wiring concealed in conduit and use weatherproof junction boxes.
Some homeowners go further with kegerators, wine coolers, or built-in ice makers. These require dedicated water lines, drains, and electrical circuits, plan the layout early so utility rough-ins happen before the structure is built.
DIY vs. Professional Installation: Which Route Should You Take?
Deciding between a DIY build and hiring a contractor hinges on three factors: skill level, scope, and permitting requirements.
DIY-friendly projects include simple linear islands built with modular kits or basic masonry block frames. If the homeowner has experience with concrete work, tile setting, or light framing, and the island only requires a propane grill (no utility hookups), a weekend build is realistic. Modular stainless or polymer frame kits are especially beginner-friendly, they bolt together like outdoor furniture and don’t require mortar or specialized tools.
When to call a pro: any project involving gas lines, water supply, or complex electrical work. Licensed tradespeople ensure code compliance and handle permit pulls. In many jurisdictions, running a new gas line or installing a 240V circuit for a built-in appliance requires a licensed contractor and inspection. Trying to DIY these elements can void homeowners insurance or create serious safety hazards.
Masonry-intensive builds, stacked stone veneer, full-height block walls, or poured concrete countertops, also benefit from professional help unless the homeowner has prior experience. These aren’t forgiving materials: mistakes are hard to undo and expensive to fix.
Permitting varies widely by location. Some municipalities require permits for any permanent structure over a certain size or height, or for any work involving gas, water, or electrical. Others have more relaxed rules for non-enclosed outdoor structures. Check with the local building department before breaking ground. Skipping permits can complicate future home sales or insurance claims.
Cost comparison: a basic DIY linear island using a modular kit and drop-in grill runs $2,000 to $4,500 in materials (grill, frame, countertop, veneer). A professionally installed masonry island with mid-range appliances typically costs $8,000 to $15,000. High-end custom builds with multiple appliances, stone counters, and full utility integration can exceed $25,000.
For those with moderate skills, a hybrid approach works well: hire a plumber and electrician for rough-ins, then handle the framing, veneer, and finish work as a DIY project. This keeps the complex, code-sensitive work in professional hands while trimming labor costs.
Tool requirements for a DIY masonry island include a circular saw or masonry saw, level, trowel, mixing paddle and drill, wheelbarrow, and basic hand tools. Tile or stone countertops need a wet saw. Most of these can be rented if not already owned.
Whichever route is chosen, proper site prep is non-negotiable. The island must sit on a stable, level base, either a new concrete slab (minimum 4 inches thick with rebar or wire mesh) or an existing patio in good condition. Settling or cracking in the base will telegraph through to the island structure.
Conclusion
A BBQ island is one of the most functional and visually impactful upgrades a homeowner can make to an outdoor space. Whether opting for a simple straight-line design or a fully loaded U-shaped kitchen, the key is matching the layout and features to actual cooking habits and available space. Prioritize solid structural foundations, code-compliant utility work, and durable materials that handle weather year-round. With thoughtful planning, and honest assessment of DIY capabilities, a well-built BBQ island delivers years of meals, gatherings, and value.