Table of Contents
ToggleCreating a backyard beach isn’t just for oceanfront properties anymore. Homeowners across the country are bringing coastal vibes inland with strategically placed sand features that transform ordinary yards into relaxing retreats. Whether it’s a dedicated play zone for kids, a Zen-inspired meditation corner, or a full-blown beach hangout area, sand offers texture, visual interest, and versatility that traditional landscaping materials can’t match. The right sand installation can anchor your outdoor design, complement existing hardscaping, and provide low-maintenance appeal year-round.
Key Takeaways
- Backyard beach sand ideas offer functional and aesthetic benefits, including natural drainage, low maintenance, and budget-friendly cost ($30–$60 per cubic yard) compared to premium hardscaping materials.
- Choose the right sand type for your needs: play sand for family areas, beach sand for high-traffic zones, and avoid paver sand or silica sand that create compaction or health hazards.
- Proper installation with edging, drainage base, and landscape fabric prevents erosion, weed growth, and sand migration into adjacent areas—critical steps often overlooked by DIY enthusiasts.
- Creative applications like Zen garden sections, elevated sandboxes with shade structures, and integrated play areas transform sand into a legitimate design feature that elevates your entire yard.
- Enhance your backyard beach with coastal plant selections (ornamental grasses, succulents, salt-tolerant natives), warm LED lighting (2700K–3000K), and natural materials like driftwood and weathered stone for cohesive design.
- Regular maintenance—weekly raking, monthly aeration for play areas, and topping off sand every 2–3 years—ensures your sand feature remains safe, attractive, and functional year-round.
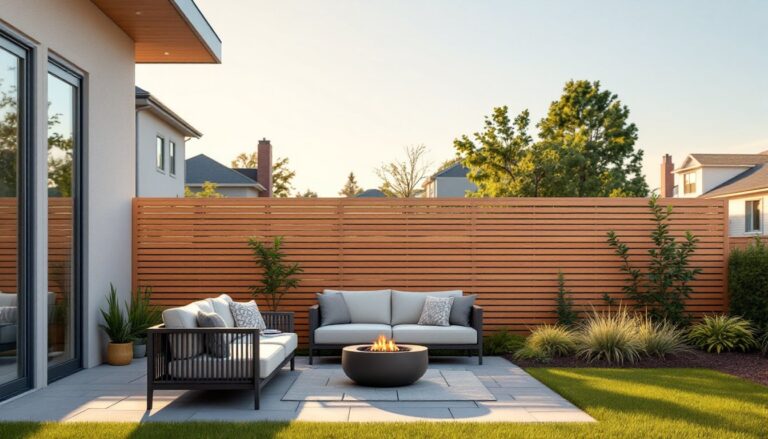
Why Add Sand to Your Backyard?
Sand brings functional and aesthetic benefits that go beyond nostalgia. It’s naturally permeable, allowing rainwater to drain through rather than pooling on the surface, a big plus in areas with clay-heavy soil or drainage issues. Unlike mulch or gravel, sand doesn’t decompose or require annual replenishment, which cuts down on maintenance time.
From a design standpoint, sand creates contrast. When bordered by pavers, timber edging, or stone, it defines zones within your yard and adds visual texture. Light-colored sand brightens shaded areas and reflects heat less than dark mulch or concrete, making it comfortable underfoot during summer months.
Sand also invites interaction. Kids gravitate toward it naturally, and adults appreciate the sensory experience, think barefoot lounging or raking patterns in a Zen garden. Coastal-inspired backyard entertaining spaces often incorporate sand to reinforce a relaxed, vacation-like atmosphere that puts guests at ease.
Finally, sand is budget-friendly. A cubic yard of quality sand typically costs $30–$60 delivered (depending on type and region), covering roughly 100 square feet at 3 inches deep. Compare that to premium pavers or decking, and you’ll see why sand is a cost-effective way to add square footage to your usable outdoor space.
Choosing the Right Type of Sand for Your Backyard Beach
Not all sand is created equal, and choosing the wrong type will lead to dust, compaction, or messy tracking indoors. Here’s what to consider:
Play sand is the go-to for family-friendly installations. It’s finely ground, soft on bare skin, and free of sharp edges or contaminants. Look for products labeled ASTM F1487-compliant, which meet safety standards for playground surfacing. Play sand typically costs $6–$10 per 50-pound bag at home centers, though bulk delivery is more economical for larger areas.
Beach sand (also called mason sand or concrete sand) has slightly larger particles and better drainage than play sand. It compacts well without turning to dust, making it ideal for high-traffic zones or areas where you want a firmer surface. Beach sand works well as mulch in coastal-themed landscaping, surrounding drought-tolerant plants and succulents.
Paver sand is a finer-grade material designed for joint filling, not loose surfacing. It compacts too tightly for comfortable barefoot use and tends to harden over time. Skip this for beach features.
Decomposed granite (DG) isn’t technically sand, but it’s worth mentioning as an alternative. DG offers similar drainage and a natural look with better stability for furniture placement. It’s popular in arid climates and comes in tan, gold, or reddish tones.
Avoid silica sand used for sandblasting, it’s dangerously fine and can cause respiratory issues. Steer clear of all-purpose sand or fill sand unless the supplier confirms it’s washed and free of clay or silt, which create muddy messes after rain.
When calculating how much sand you need, measure your area in square feet and decide on depth. For play areas, aim for 12 inches of sand over compacted subgrade to cushion falls. For decorative features, 3–4 inches is sufficient. Use this formula: (Length × Width × Depth in feet) ÷ 27 = cubic yards needed.
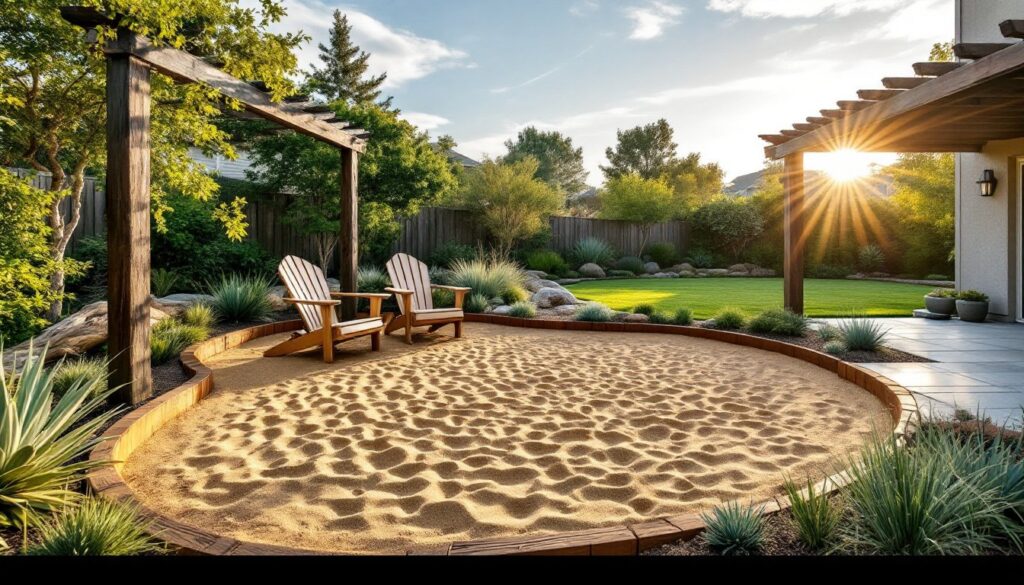
Creative Backyard Beach Sand Design Ideas
Sand doesn’t have to mean a basic sandbox. Strategic placement and thoughtful boundaries turn sand into a legitimate landscape feature that elevates your entire yard.
Sandboxes and Play Areas for Kids
A dedicated sandbox is the most straightforward application and delivers years of use. Build a containment frame using pressure-treated 4×4 or 6×6 timbers secured at the corners with rebar driven through predrilled holes. For a 10×10-foot sandbox, you’ll need approximately 3.7 cubic yards of play sand for a 12-inch depth.
Consider adding shade. A simple pergola frame with retractable shade cloth (95% UV block) or a permanently mounted sail keeps sand cooler and protects kids during peak sun hours. Include bench seating along the perimeter, 2×8 or 2×10 boards capped on the frame, so parents can supervise comfortably.
For families with younger kids, integrate the sandbox into a larger outdoor entertainment area where adults can relax within sight lines. Position it near patios or decks rather than isolating it at the yard’s edge.
Safety tip: Install landscape fabric beneath the sand to prevent weeds and discourage burrowing pests. Staple it to the inside of your timber frame before filling. Avoid plastic tarps, they trap moisture and promote mold.
Zen Garden Sand Sections
Raked sand gardens borrow from Japanese karesansui (dry landscape) traditions and offer meditative appeal without the maintenance of water features. Dedicate a 6×8-foot or 8×10-foot section bordered by natural stone or composite edging. Use coarse beach sand or fine gravel (3/8-inch pea gravel works well) for easier raking.
Incorporate large boulders as focal points, position them asymmetrically for visual balance. Add low-maintenance elements like ornamental grasses, agave, or yucca planted in raised mounds within the sand.
Rake the sand into patterns, concentric circles around boulders or parallel lines, using a wide-toothed garden rake or a dedicated Zen rake (available for $15–$25 online). Change patterns weekly or monthly as a mindfulness practice.
For the best results when planning a backyard hangout, position your Zen garden where it’s visible from indoor living spaces or outdoor seating areas. Frame it with low lighting, 3-watt LED path lights on timers create subtle ambiance without overpowering the minimalist aesthetic.
How to Install and Maintain Your Backyard Sand Feature
Proper installation prevents the most common sand problems: erosion, weed growth, and contamination with soil or debris. Here’s the process:
Step 1: Layout and Excavation
Mark your perimeter with spray paint or landscape marking flags. Excavate to your target depth plus 2–3 inches for base material. For play areas, dig down 14 inches total (12 inches sand, 2 inches base). For decorative features, 5–6 inches is adequate.
Step 2: Install Edging
Edging is non-negotiable. Without it, sand migrates into grass and planting beds. Options include:
- Timber frames: Best for rectangular sandbox-style installations. Anchor with 18-inch rebar stakes every 4 feet.
- Composite or plastic edging: Flexible for curved designs. Secure with 10-inch landscape spikes every 2 feet.
- Natural stone: Flagstone or fieldstone creates organic borders. Set in a 2-inch sand bed and backfill with soil on the outside.
Ensure edging extends 2–3 inches above finished sand level to contain material during raking or play.
Step 3: Add Base Layer and Fabric
Spread 2 inches of compacted crushed stone (3/4-inch minus) as a drainage base. This step is critical in clay soils. Tamp with a hand tamper or plate compactor.
Lay commercial-grade landscape fabric (4–5 oz. per square yard minimum) over the base, overlapping seams by 6 inches. Staple or pin fabric to edging.
Step 4: Fill with Sand
Pour sand in stages, spreading and leveling as you go. Use a garden rake and straight 2×4 to screed the surface flat. Don’t overfill, leave 1–2 inches below the edging lip for easier containment.
Step 5: Maintenance
Rake sand weekly to redistribute material and remove debris, leaves, twigs, and pet waste must be removed promptly. For play areas, turn the sand monthly to aerate and check for hidden hazards.
Cover sandboxes with a fitted tarp or hinged wooden lid when not in use to keep out animals and excess moisture. Inspect edging annually: frost heave or settling can loosen stakes.
Top off sand every 2–3 years. Some loss through wind or tracking is inevitable. Budget for 0.5 cubic yards per 100 square feet as a refresh.
Safety note: Always wear gloves and a dust mask when spreading sand. Fine particles become airborne easily, especially on windy days.
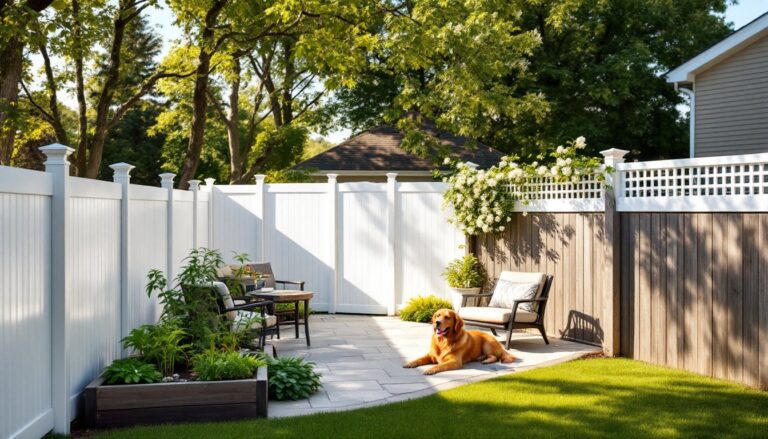
Complementing Your Sand Area with Beach-Themed Landscaping
Sand looks its best when integrated into a broader coastal landscape design. The goal is cohesion, your sand feature should feel intentional, not like an afterthought.
Plant Selection
Choose drought-tolerant, salt-tolerant species that evoke seaside landscapes. Good candidates include:
- Ornamental grasses: Blue fescue, fountain grass, or muhly grass add movement and texture.
- Succulents: Agave, sedum, and aloe thrive in sandy conditions and require minimal water.
- Coastal natives: Depending on your region, consider beach sunflower, sea oats, or rosemary.
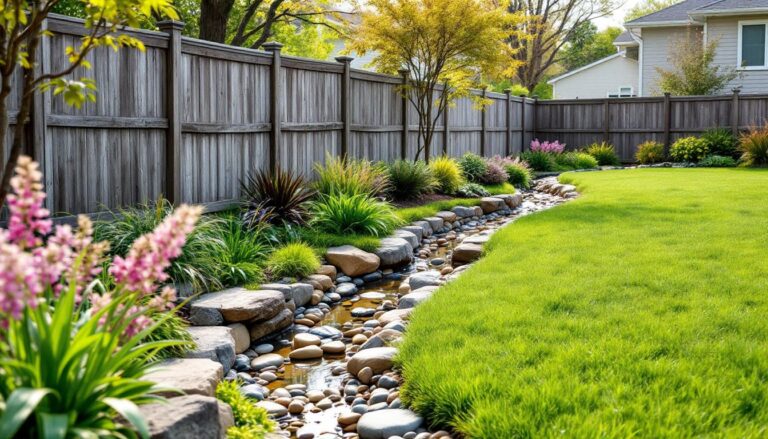
Plant in clusters or drifts rather than rows for a naturalistic look. Use 3–4 inches of gravel mulch around plant bases rather than wood mulch, which clashes visually with sand.
Hardscaping and Accessories
Frame sand areas with natural materials. Weathered wood (driftwood, reclaimed timber) and beach stones tie into the coastal theme without looking overly literal. Avoid kitschy decor, real design takes cues from nature rather than souvenir shops.
Add Adirondack chairs or sling-style seating in the sand or adjacent paving. Position them for sun or shade depending on your climate. Regional design preferences often favor covered seating in hot climates, while northern yards embrace open sun exposure.
Lighting and Fire Features
String Edison-style bistro lights overhead or install low-voltage LED path lights along borders. Warm white (2700K–3000K) bulbs enhance the sand’s natural tones without harsh glare.
A propane or natural gas fire pit creates a focal point for evening gatherings. Site it on a non-combustible pad (pavers, flagstone, or poured concrete) adjacent to, but not within, the sand area. Maintain a 10-foot clearance from structures per most local fire codes.
Water Features
If space and budget allow, a recirculating fountain or small pond near your sand feature enhances the beachy vibe. Use flexible pond liner and disguise edges with river rock or flagstone. Submersible pumps (200–400 GPH) are adequate for small fountains and cost $30–$60.
Drainage is key, direct overflow away from the sand area to prevent saturation. Position the feature downhill if possible or install a French drain (4-inch perforated pipe in gravel trench) as a safety valve.
For more ideas on creating multifunctional outdoor spaces, explore entertainment backyard layouts that blend activity zones with relaxation areas. Successful designs consider sight lines, traffic flow, and how different spaces interact throughout the day.
Final Thought
A well-executed backyard beach isn’t about replicating the coast exactly, it’s about capturing the feeling. Clean lines, natural materials, and thoughtful plant selection create a space that invites barefoot lounging and unhurried afternoons. Whether you’re building a sandbox for toddlers or a Zen garden for personal retreat, the sand itself is just the starting point. The real work, and reward, comes from integrating it into a landscape that reflects how you actually live outdoors.