Table of Contents
ToggleStanding water in your backyard isn’t just an eyesore, it kills grass, breeds mosquitoes, and can undermine foundations if left unchecked. A properly installed drainage ditch redirects runoff, protects structures, and can actually enhance your landscape instead of scarring it. Whether you’re dealing with seasonal flooding or persistent soggy spots, the right drainage solution depends on your yard’s grade, soil type, and how much water you’re moving. This guide walks through proven ditch designs that balance function with curb appeal, plus practical installation tips to get the job done right the first time.
Key Takeaways
- Standing water damages foundations, kills grass, and breeds mosquitoes—proper backyard drainage ditch ideas prevent these costly problems before they start.
- Successful drainage requires a consistent 1-2% slope to keep water flowing without causing erosion or creating pooling spots.
- French drains work best for subsurface water, while rock-lined swales and dry creek beds are ideal for visible surface runoff that you want to blend into your landscape design.
- Bioswales offer the most eco-friendly drainage solution by filtering pollutants and reducing runoff, though they require more maintenance and 1-2 years for plants to fully stabilize.
- Always call 811 to mark utilities before digging, and test your drainage with a hose before backfilling to avoid expensive repairs after installation.
- Mini excavators ($200-300/day rental) save significant time and improve grading accuracy for drainage projects longer than 50 feet.
Why Proper Drainage Ditches Matter for Your Backyard
Poor drainage does more damage than most homeowners realize. Water pooling near your foundation can seep into basements, crack concrete as it freezes and thaws, and create hydrostatic pressure against retaining walls. In the yard itself, saturated soil suffocates grass roots, encourages fungal disease, and turns high-traffic areas into mud pits.
A functional drainage ditch intercepts surface runoff and groundwater before it causes problems. The goal is to redirect water to a safe discharge point, a storm drain, dry well, or lower area of your property where it won’t cause erosion. Depending on local codes, you may need a permit if your drainage plan affects neighboring properties or connects to municipal systems.
Grade is everything. Water flows downhill, so your ditch needs a consistent slope, typically 1-2% grade (1 to 2 inches of drop per 10 feet of run) to keep water moving without causing erosion. Flat or reverse grades create standing water, while too-steep slopes wash out soil and gravel. If your yard doesn’t have natural slope, you’ll need to excavate deeper at the discharge end or consider a subsurface system.
Ignoring drainage problems costs more in the long run. Foundation repairs, landscape replacement, and dealing with mold or pest infestations from persistent moisture add up fast. Installing a drainage ditch is preventive maintenance that protects your property value.
French Drain: The Classic Underground Solution
A French drain is a subsurface trench filled with gravel and a perforated pipe that collects and redirects groundwater. It’s the go-to solution when you want effective drainage without a visible ditch cutting across your yard. The pipe sits at the bottom of the trench, wrapped in landscape fabric to prevent soil from clogging the perforations.
Typical installation involves digging a trench 12-18 inches wide and 18-24 inches deep, though depth varies based on how much water you’re managing. Line the trench with landscape fabric, add 2-3 inches of ¾-inch drainage gravel, lay 4-inch perforated PVC or corrugated pipe with holes facing down, then backfill with more gravel. Fold the fabric over the top and cover with a few inches of soil or sod.
Homeowners installing a French drain should plan for roughly 50-100 linear feet of trench for most residential drainage issues, though complex grading may require longer runs or multiple drains. The pipe must daylight (exit above ground) at a lower elevation or connect to a catch basin or dry well.
French drains work best for intercepting subsurface water or draining soggy areas, but they’re not ideal for heavy surface runoff, they’ll overwhelm quickly in a downpour. Pair them with surface solutions if you’re dealing with both problems. Maintenance is minimal, but tree roots and sediment can eventually clog the system, so avoid planting large trees directly over the trench.
Decorative Rock-Lined Drainage Ditches
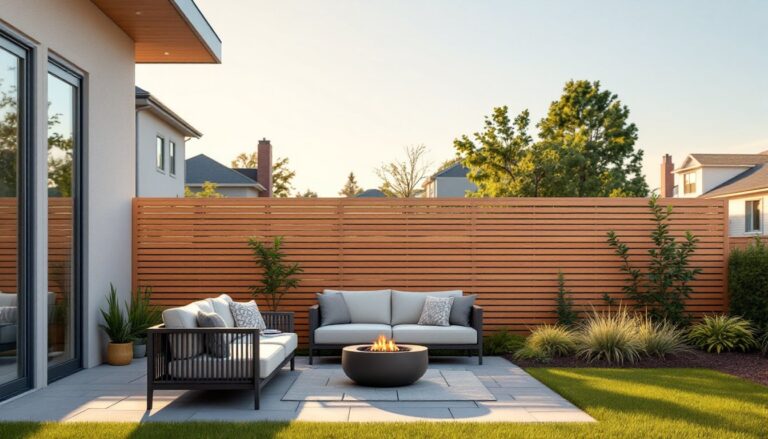
A rock-lined swale combines function and aesthetics, it’s an open, shallow channel lined with decorative stone that handles surface runoff while looking intentional. This approach works when you need visible drainage that complements your landscape instead of looking like construction.
Excavate a shallow, gently sloping channel 12-24 inches wide and 4-8 inches deep along the path you want water to follow. Shape the bottom with a smooth, consistent grade. Line the entire channel with landscape fabric to suppress weeds, then fill with river rock, pea gravel, or larger cobblestones depending on the look you want. Larger stones (3-6 inches) handle heavier flow without washing away: smaller gravel works for light drainage but may migrate over time.
Edge the ditch with larger boulders, pavers, or landscape timbers to define the feature and prevent erosion along the banks. You can integrate the swale into a garden bed or along a fence line so it feels like a design element rather than a drainage fix. The key is making sure the rock layer is thick enough, 3-4 inches minimum, to slow water velocity and allow infiltration.
This style requires periodic maintenance. Leaves, mulch, and sediment accumulate in the rock over time, reducing flow capacity. Plan to rake out debris in spring and fall, and top off gravel every few years. Rock-lined ditches handle moderate runoff well but can overflow during heavy storms if undersized, so calculate your drainage needs before settling on dimensions.
Plant-Filled Bioswale Drainage Systems
A bioswale is a landscaped drainage channel designed to slow, filter, and absorb stormwater using plants and engineered soil. It’s the most environmentally friendly option, reducing runoff volume and filtering pollutants before water reaches storm drains or waterways. Bioswales look like planted garden beds but function as drainage infrastructure.
Construction is similar to a rock-lined swale, but instead of gravel, you fill the channel with a sandy loam or engineered soil mix that drains quickly while supporting plants. The swale should be 2-4 feet wide and 6-12 inches deep, with gently sloped sides (3:1 or flatter) to prevent erosion. The bottom stays flat or follows a very gentle grade to allow water to pool briefly and infiltrate.
Plant selection is critical. Choose native, water-tolerant species with deep root systems that stabilize soil and absorb moisture, think sedges, rushes, native grasses, and perennials like blue flag iris or cardinal flower. Avoid plants that can’t handle both wet and dry conditions, since bioswales cycle between saturated and dry depending on rainfall.
Bioswales require more maintenance than other drainage options. You’ll need to mulch annually, weed regularly (especially in the first year), and prune plants to keep the channel clear. They’re also slower to establish, expect a year or two before the root systems fully stabilize the swale. But once mature, they’re low-maintenance and add genuine ecological value to your property. Check local stormwater regulations: some jurisdictions offer incentives for bioswale installation.
Creek Bed-Style Drainage Features
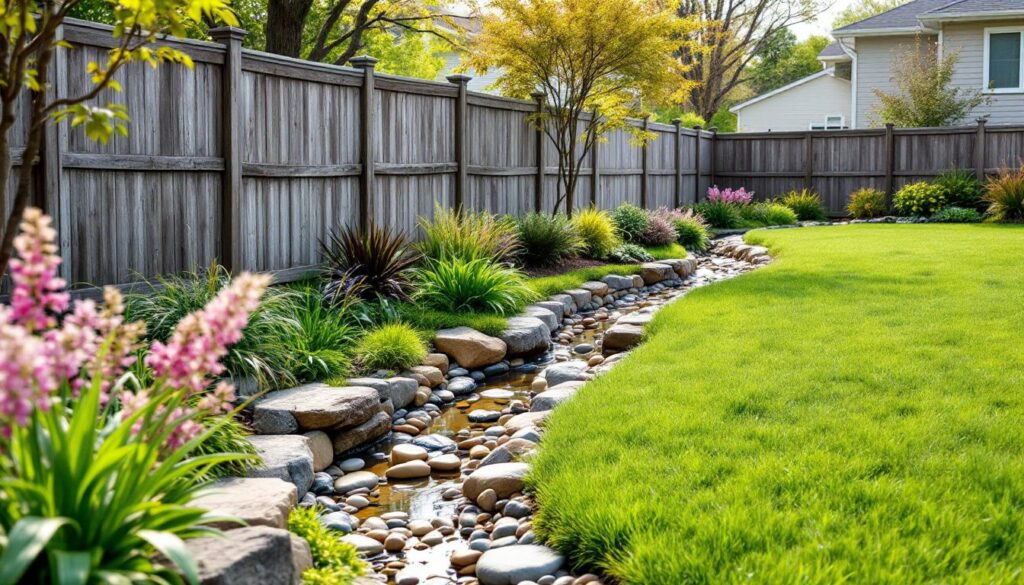
A dry creek bed mimics a natural stream channel, using a mix of stones, boulders, and plantings to create a drainage feature that looks like it’s always been part of the landscape. This works best for properties with noticeable slope where you want to embrace the drainage challenge as a design opportunity.
Start by mapping the natural flow path water takes during storms, your creek bed should follow that route. Dig a meandering channel 2-4 feet wide and 6-12 inches deep, varying the width to create visual interest. Avoid straight lines: natural creeks curve and widen at bends. Line the channel with landscape fabric, then layer in stones of mixed sizes, large boulders (12+ inches) at curves and edges, medium river rock (4-8 inches) in the main channel, and smaller gravel in shallower areas.
Place the largest boulders strategically to slow water and prevent erosion at high-flow points. Partially bury them so they look natural, not plopped in place. Fill gaps with smaller stones and plant moisture-loving ornamental grasses, ferns, or groundcovers along the banks. The goal is a creek bed that looks convincing when dry but functions as a drainage channel during rain.
Homeowners researching drainage ditch installation often underestimate how much stone they’ll need, plan on 1.5-2 tons of rock per 10 linear feet for a 3-foot-wide creek bed with adequate depth. A dry creek bed handles heavier runoff than a planted bioswale but requires less maintenance than plantings alone. The main upkeep is clearing leaves and debris that accumulate in the stones.
DIY Installation Tips for Backyard Drainage Ditches
Before you dig, call 811 to mark underground utilities. Hitting a gas line, electric cable, or water main turns a drainage project into an emergency. Most states require this free service, and it takes 2-3 business days for crews to mark your property.
Measure twice, dig once. Lay out your ditch route with stakes and string, checking grade with a 4-foot level and a long straightedge or rent a laser level for longer runs. Even a slight uphill section will create a low spot where water pools. If you’re eyeballing it, you’re doing it wrong.
Tools you’ll need:
- Flat shovel and trenching spade
- Pickaxe or mattock for hard soil or clay
- Wheelbarrow for moving soil and gravel
- Tamper for compacting trench bottoms
- Landscape fabric and fabric pins
- Level and tape measure
A mini excavator (rentals run $200-300/day) makes sense for runs longer than 50 feet or trenches deeper than 18 inches. You’ll finish in hours instead of days and get more consistent results. For projects installing a French drain, a trencher attachment saves even more time on long, straight runs.
Soil disposal is a real issue. A 50-foot trench that’s 12 inches wide and 18 inches deep generates roughly 1.5 cubic yards of soil, that’s multiple wheelbarrow loads. Plan where you’ll use or dump it before you start digging.
Safety gear is non-negotiable: sturdy boots with ankle support, work gloves, and eye protection if you’re breaking up hard soil or rock. Back injuries are common with repetitive digging: pace yourself and use proper lifting form. If your project involves moving more than a few yards of soil or requires precise grading, hiring a landscaper with an excavator isn’t weakness, it’s smart budgeting of your time and your back.
Test your drainage before backfilling or adding final stone. Run a hose at the high end and watch how water flows. Adjust grade or add check dams (small barriers that slow flow) if needed. Fixing drainage issues after the ditch is finished means tearing it apart and starting over.
Conclusion
A well-designed drainage ditch solves real problems while enhancing your property instead of just patching it. Whether you choose an underground French drain, a decorative rock swale, or a creek bed feature, the success comes down to proper planning, accurate grading, and matching the solution to your site’s specific challenges. Take the time to measure, test, and build it right, your foundation, your lawn, and your weekends will all be better for it.